The instructions below have been customized for your project "".
Customize these instructions for the project
How to bulk-import or export redirection rules?
Importing rules is a productive way to add many rules at once. redirection.io supports multiple import types, tailored for various purpose.
- the redirect rules CSV allows you to import redirect rules defined in
.csvfiles. This file can contain markers, as you can use them in the rule creation form. - the meta tags CSV import is designed to bulk-import Meta-Tag rules using a
.csvfile. - the JSON import allows you to bulk-import all type of rules, using an exhaustive format for your rules.
It is also possible to bulk-delete rules, by importing the list of the IDs of the rules to delete.
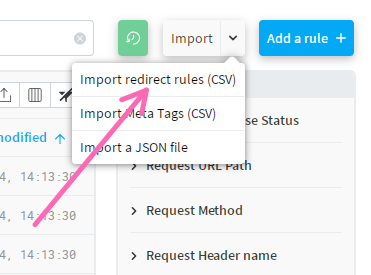
Redirect rules CSV import
The import screen can be accessed from the "Rules list" screen:

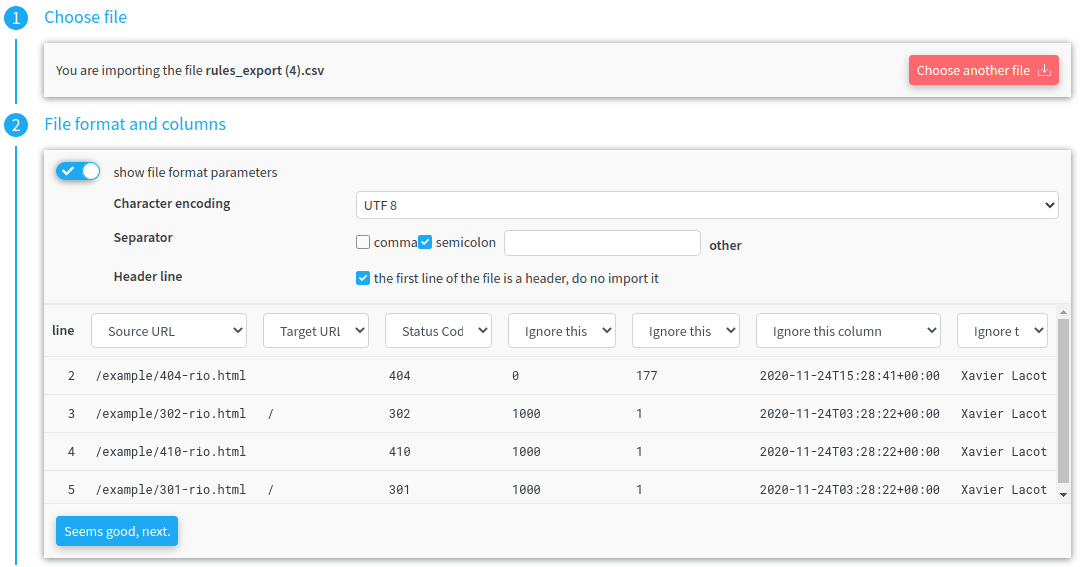
- Select a CSV file containing the redirections that you want to setup. The import tool helps defining the role of each column, so the columns order is not important.
- the Markers step allows to define the properties of markers strings that have been included in the file. Each occurrence of a marker string will be replaced with a redirection.io marker
- At the "Execute import" step, you can choose to ignore errors in the imported file. If this switch is checked, the import tool will do its best to import all the rules it is possible and safe to create, and it will ignore errors or warnings. If the switch is not checked, the import will be more strict and completely fail even if there is only one error.
- Once started, the import duration depends on the number of rules to import - it usually takes some seconds, but can take several minutes if there are tens of thousands of rules. Should there be mistakes in the import file, the import tool will allow to download a CSV file containing the errored lines, so that you can fix them and try again to import the redirections file.


Format of the import file
The import tool of redirection.io is rather flexible and permissive. Here are some tips to know:
- the order of the columns does not matter;
- the CSV can include a header line, or not;
- imports can include markers;
- the CSV file can also be used to create 404 or 410 responses.
The columns order is not important
The only requirements on imported files is the file format, which must be a valid CSV file.
Once you have selected the file to import, the import tool displays the 100 first lines of the file. It allows to ignore the first line (if it is a header line) and define the role of each column. The column roles that can be mapped are: Source URL, Target URL, Status Code, Priority, Tags. These columns can appear in any order in the CSV file.
The three following columns are required:
- Source URL*: This is the URL that will trigger a redirect response. It can be an URL starting with
/or://orhttp://orhttps:// - Target URL*: This is the URL the user will be redirected to. It can be an URL starting with
/or://orhttp://orhttps:// - Status Code*: This is the status code to use for the redirect. Make sure to choose a valid redirect status code
There can be two optional columns:
- Priority: a numeric value to define the priority of the rule. Higher priority rules will take precedence over lower priority ones
- Tags: comma-separated tags to be attached to the rule
The CSV file can include a header line, or not
The imported file can contain a header line, or not. During the import, you can tweak import options to bypass the first line. So, both of these files are valid to run an import:
Source URL;Target URL;Status Code
/some-source;/some-target;302
/this-is-not-found;;404
/this-is-gone;;410
and
/some-source;/some-target;302
/this-is-not-found;;404
/this-is-gone;;410
Imported files can define markers
Markers are a great feature of redirection.io to create rules that can be applied to many URLs at once.
In the third step of the rules import, you can define which strings have to be replaced with a marker. For example, you could import the following CSV file:
Source URL;Target URL;Status Code;Priority;Tags
/products/[CATEGORY_NAME];/shop/[CATEGORY_NAME];301;10;shop,category
/products/[CATEGORY_NAME]/[PRODUCT_ID]-[PRODUCT_NAME].html;/shop/[PRODUCT_ID]-[PRODUCT_NAME];301;10;shop,product
/products/[ANYTHING];/shop;302;1;shop
Specific strings have been used in the example CSV file:
[CATEGORY_NAME][PRODUCT_ID][PRODUCT_NAME]
These strings are placeholders that are intended during the import with redirection.io markers. This can be directly made at the 3rd step of the import form, or in the marker templates configuration if you think that these markers will frequently be used in your project:

Once the import is executed, three rules will be created with the configured markers:

Publish the rules, and they'll be applied to your website in seconds.
Imports can also define 404 and 410 actions
The import tool has been designed to help importing large redirection collections, but it can also be used to create rules with HTTP 404 - Not found or HTTP 410 - Gone actions. You just need to add a "Status code" column in the CSV file:
Source URL;Target URL;Status Code
/some-source;/some-target;302
/this-is-not-found;;404
/this-is-gone;;410
Importing very large rulesets
The import tool has been designed to import very large redirection files. The number of rules that can be created with one single import depend on the size of each URL, but you can expect to be able to load ~500k redirection rules with one single import, and it should take about 10 minutes to complete.
When importing large redirection files, we advise to check the switch "Ignore import errors". If there are some errors in the file, you will be able to download a CSV file at the end of the import, containing only the lines with errors. Once fixed, you may re-import this file to have your redirection plan completed in the shortest possible time.
Meta tag rules CSV import
As for the Redirects CSV Import, importing Meta tags is possible using a CSV file. The process is basically the same:
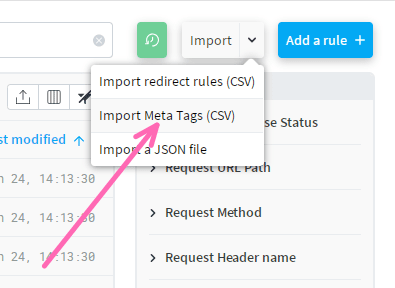
- Select a CSV file containing the meta tags that you want to configure. The import tool helps defining the role of each column, so the columns order is not important.
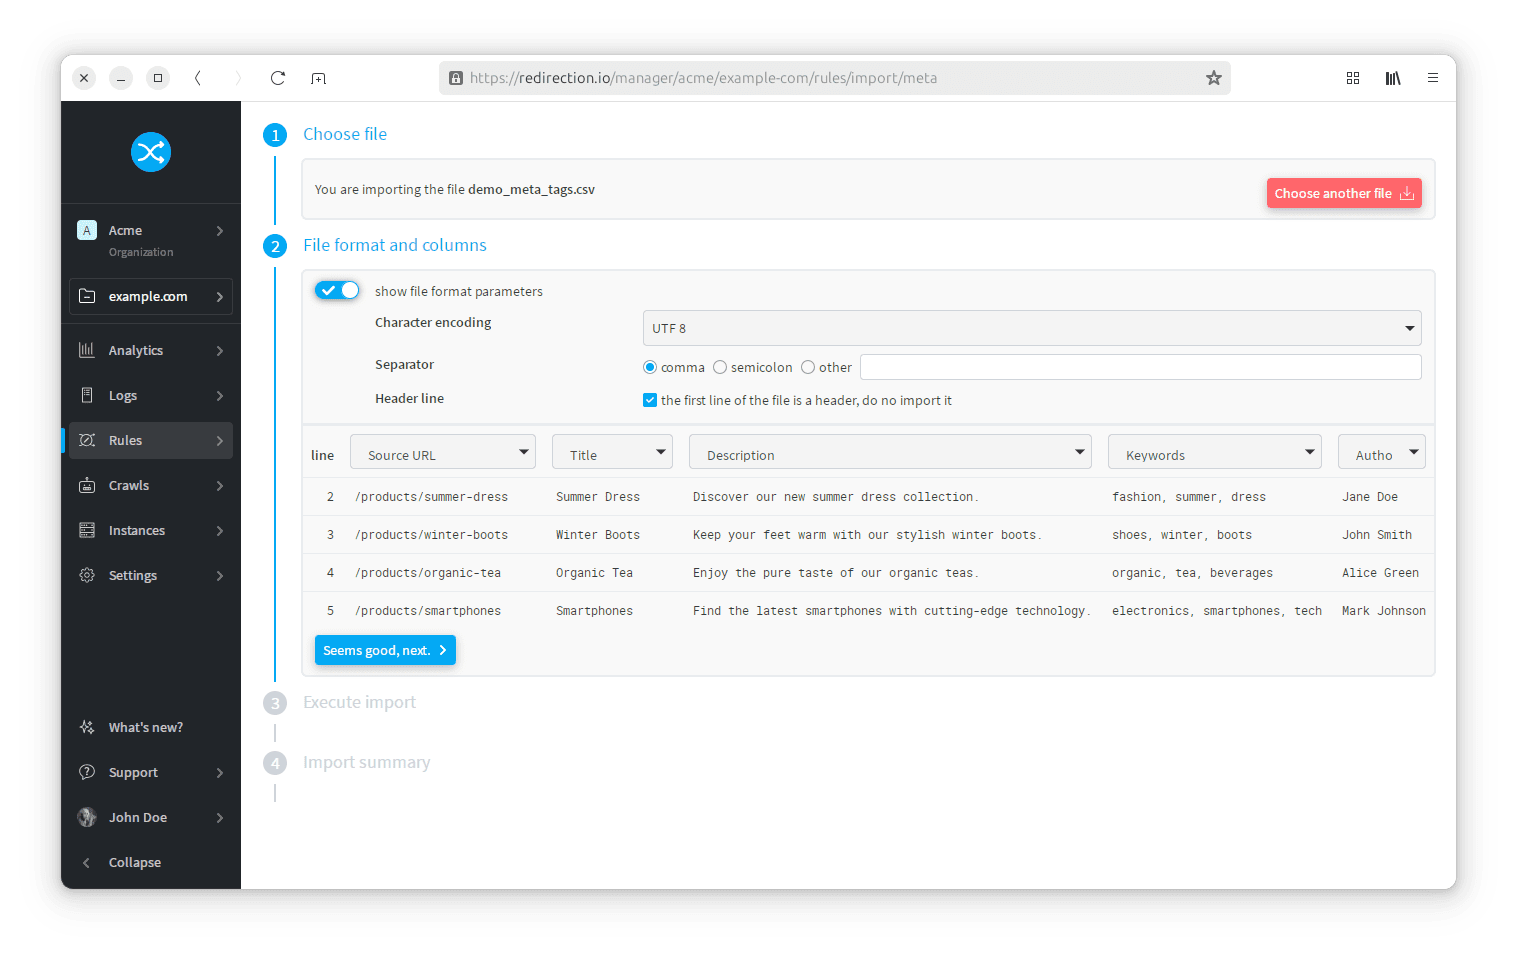
- On the next step, hit the "Start the Import" button and, after a few seconds, you should see the newly created rules appear under the rules list. Publish those, and your website's Meta Tags will be updated!


Meta tags CSV file format
The imported file can contain a header line, or not, and the order of the columns does not matter. Your CSV file can even include columns that you do not want to import. During the import, you can tweak import options to bypass the first line.
Here is an example valid CSV file for the Meta Tags import. Of course, you can include more columns in it:
URL,Title,Description,Tags
/products/gaming-chairs,Gaming Chairs,Comfortable and stylish gaming chairs.,"furniture, gaming, chairs"
/products/laptop-bags,Laptop Bags,Protect your laptop with our durable bags.,"laptop, bags, accessories"
/products/smartphones,,Find the latest smartphones with cutting-edge technology.,"electronics, smartphones, tech"
/products/sports-watches,Sports Watches,Stay active with our sports watch collection.,"sports, watches, accessories"
/products/wireless-earbuds,Wireless Earbuds,Experience premium sound with our wireless earbuds.,"electronics, earbuds, wireless"
For ease of reading, here's what the contents of this file look like:
| URL | Title | Description | Tags |
|---|---|---|---|
| /products/gaming-chairs | Gaming Chairs | Comfortable and stylish gaming chairs. | furniture, gaming, chairs |
| /products/laptop-bags | Laptop Bags | Protect your laptop with our durable bags. | laptop, bags, accessories |
| /products/smartphones | Find the latest smartphones with cutting-edge technology. | electronics, smartphones, tech | |
| /products/sports-watches | Sports Watches | Stay active with our sports watch collection. | sports, watches, accessories |
| /products/wireless-earbuds | Wireless Earbuds | Experience premium sound with our wireless earbuds. | electronics, earbuds, wireless |
As the Title cell for the URL /products/smartphones is empty, the rule created for this URL will not contain any changes to the <title> tag.
Imported files limits
The limit of the size of import files is quite high, and mainly depends on the size of the URLs defined in the file. You should be able to import several hundred of thousands of rules with a single file. If it does not work, please split the import in several smaller files.
JSON import
JSON import is both more complete and more complicated than the CSV import functions. This import format allows you to create advanced rules, including all the types of triggers and actions that redirection.io supports. On the other hand, it can be a little tricky to write, and will undoubtedly require the intervention of a developer.
To put it simply, the syntax supported for the JSON import file is the same as the payloads in redirection.io's public API.
A good starting point, if you wish to write a JSON rules import file, is to first export your project in JSON, modify the file thus downloaded before re-importing it.
- Under "Settings" > "Rules", locate the "Ruleset export & import" block.
- Click on the button "Export the ruleset as a json file"
- Edit this file
- Import it using the "Import the ruleset" button
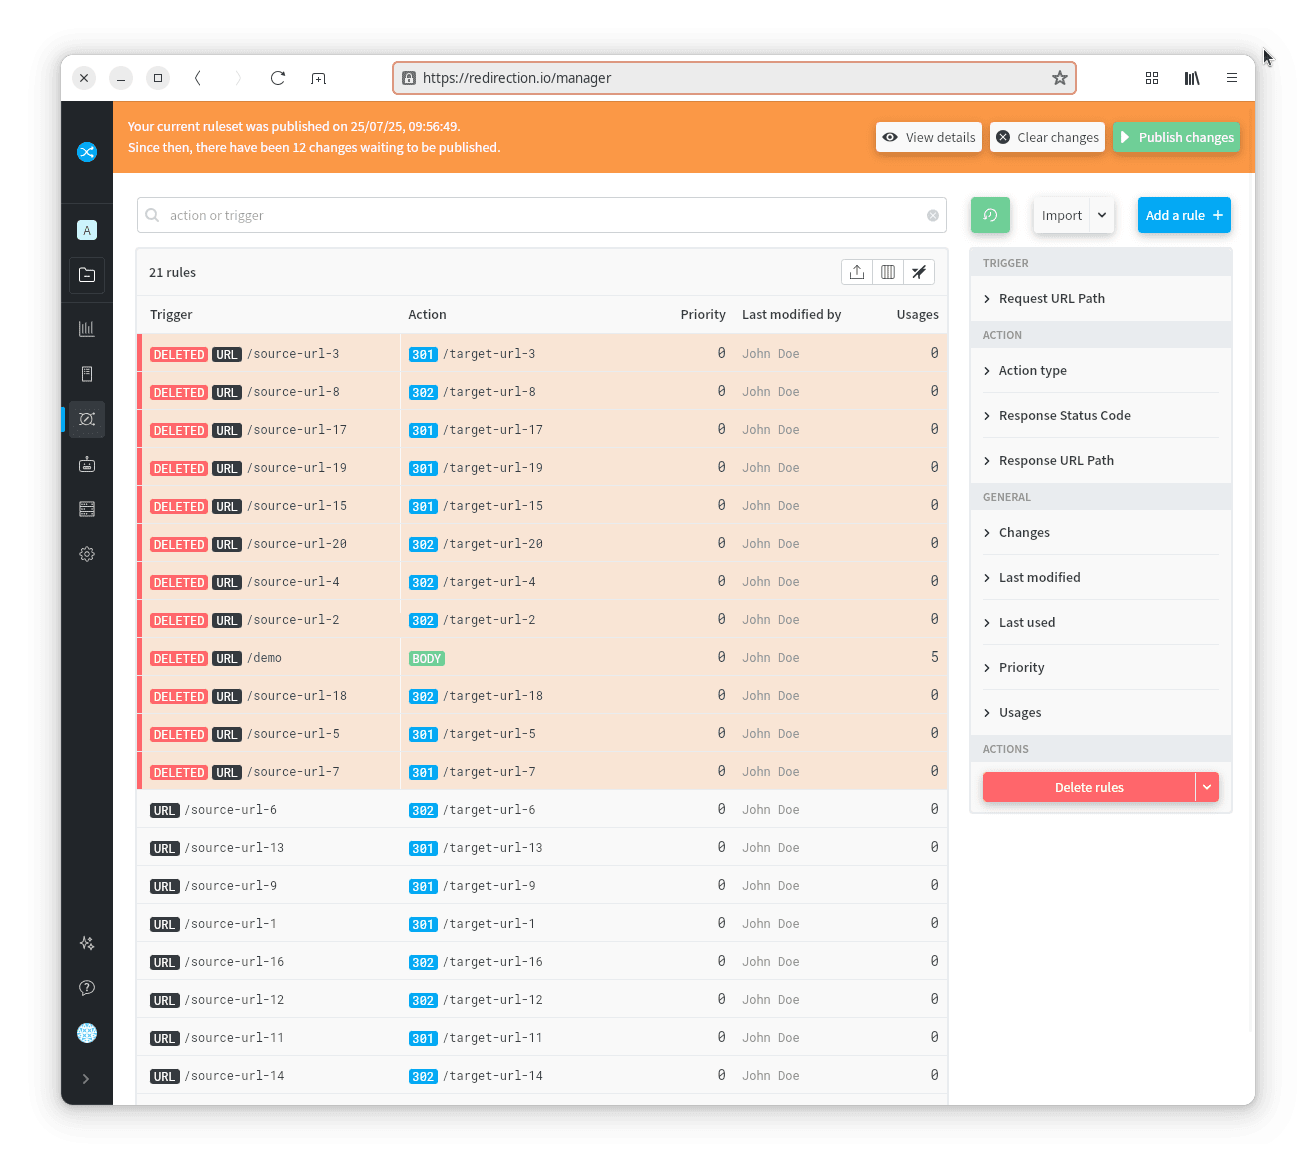
Bulk deleting rules
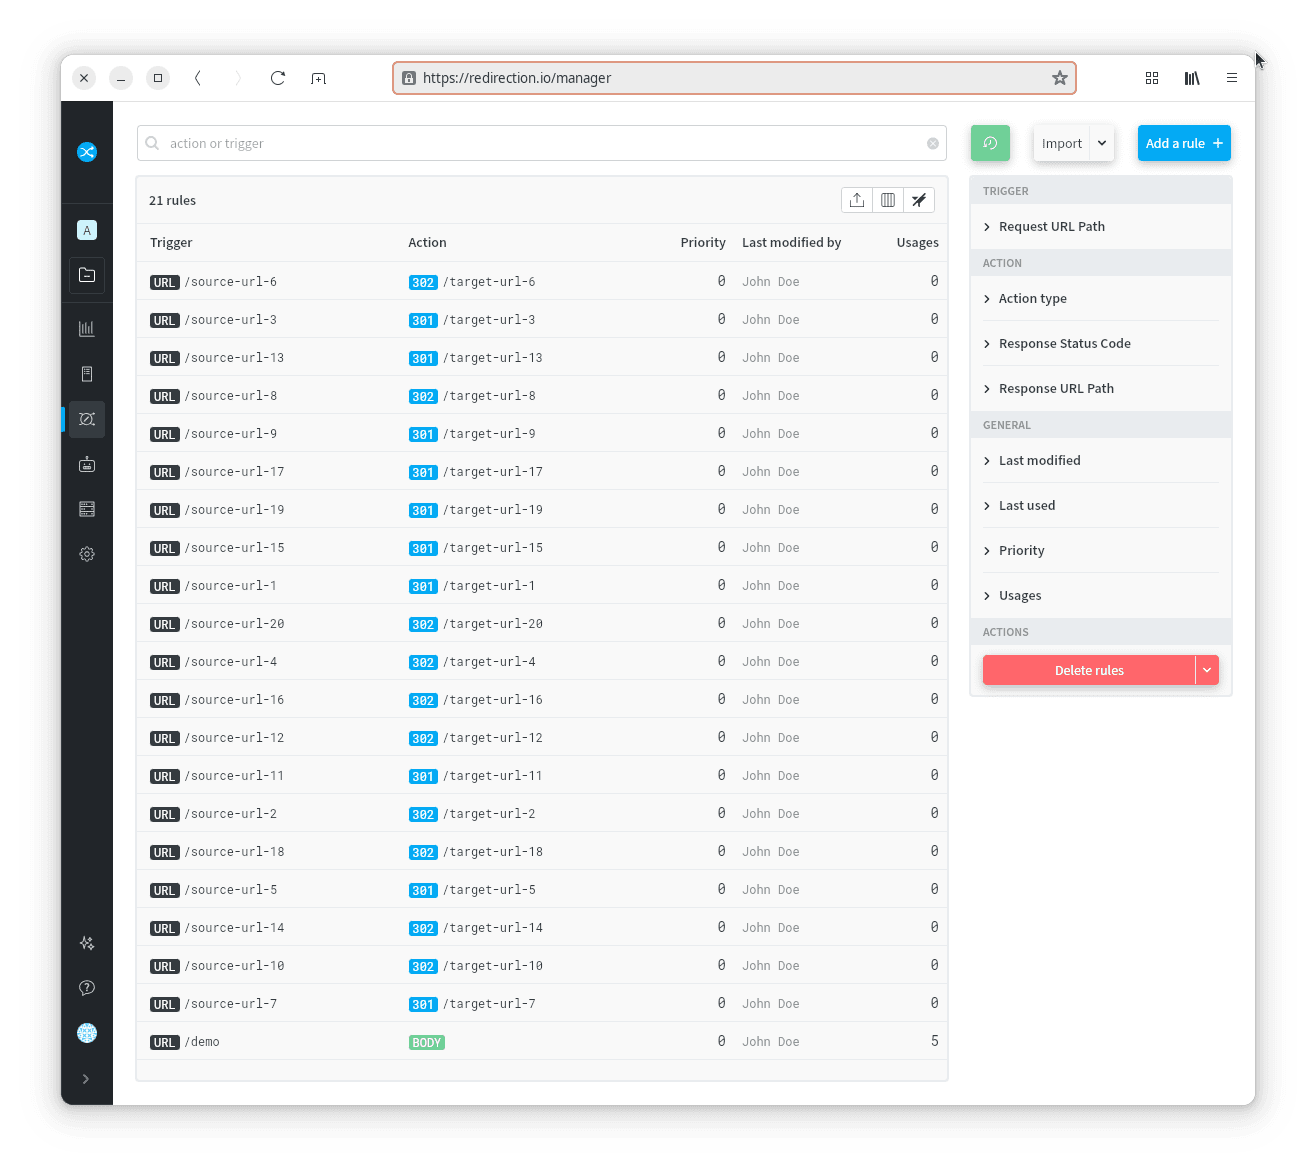
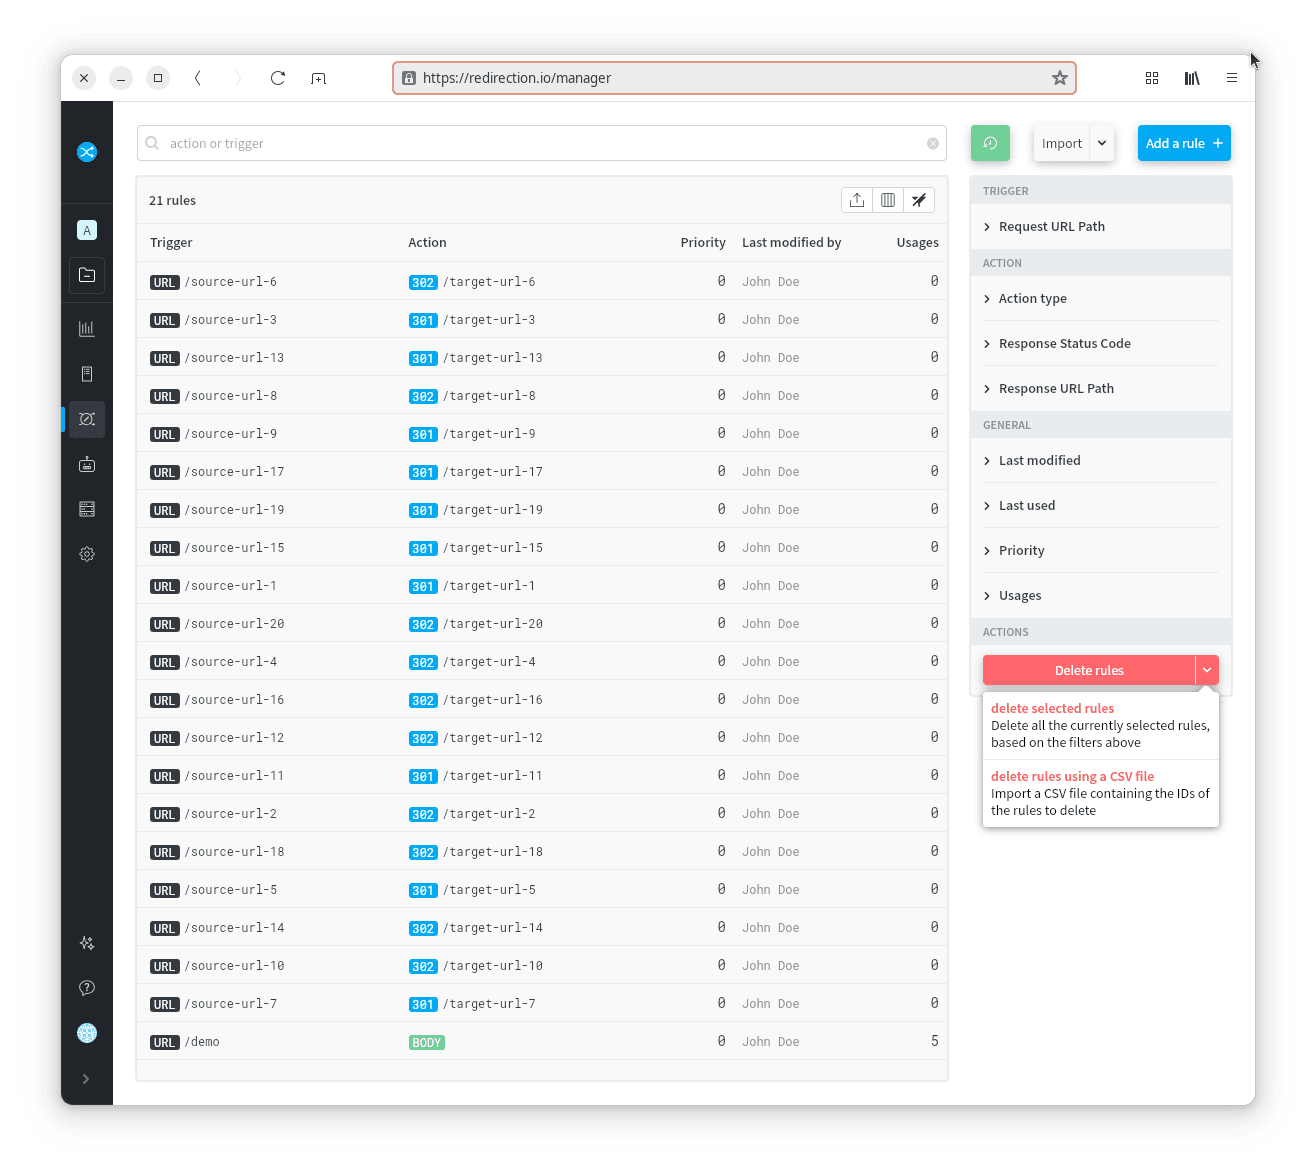
You can mass-delete rules in the redirection.io manager in two ways from the rules list:
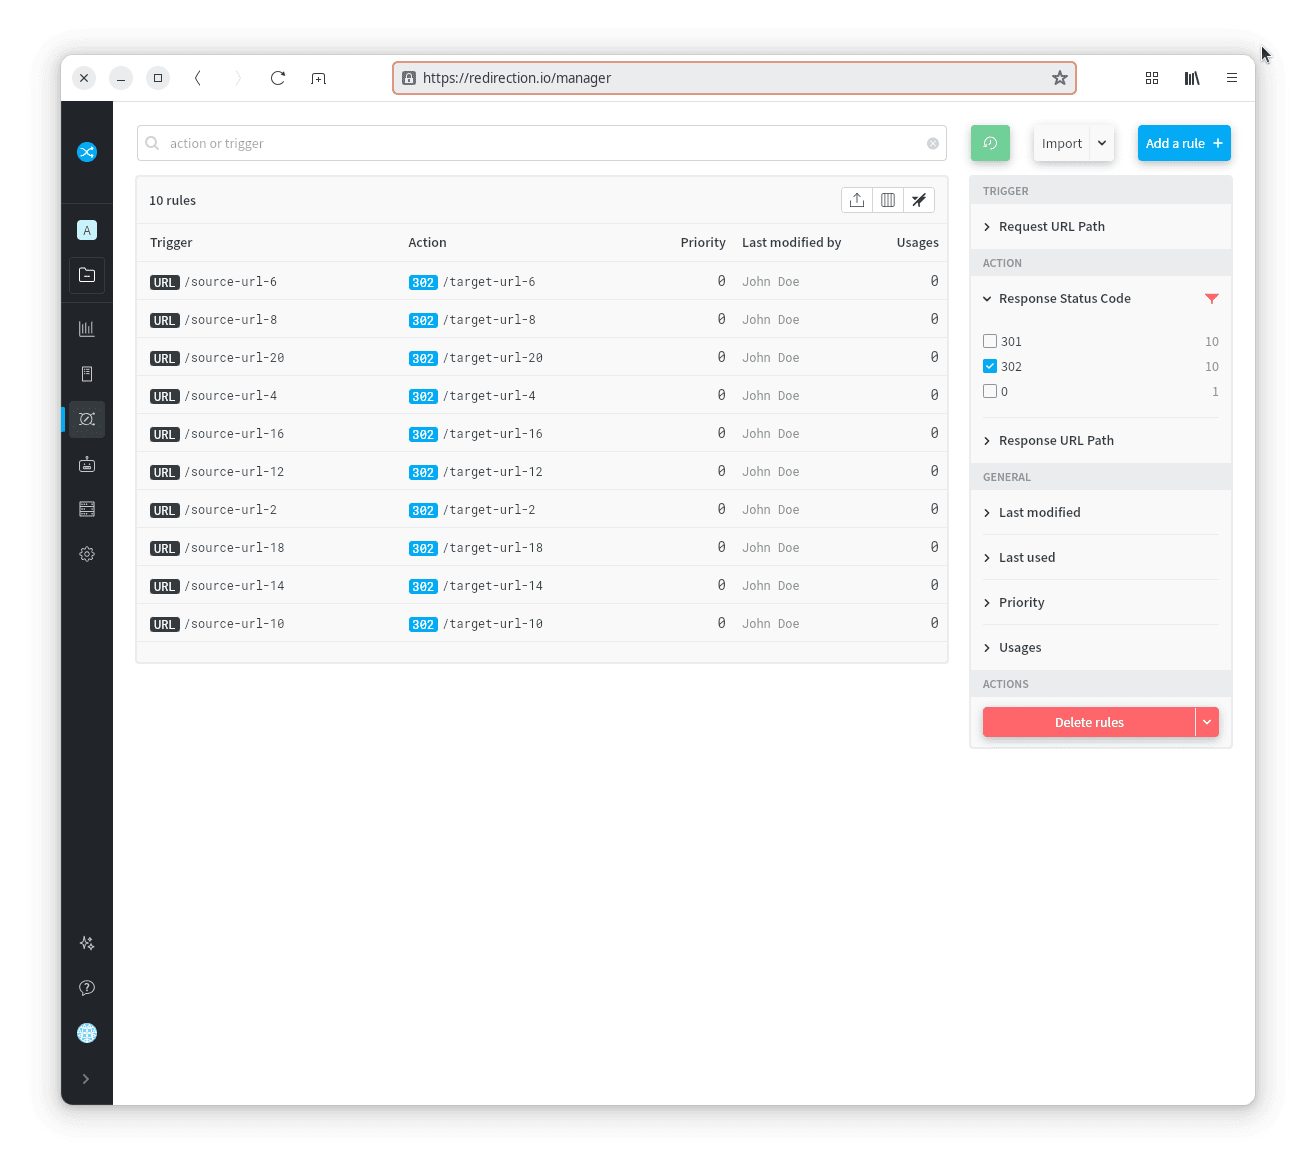
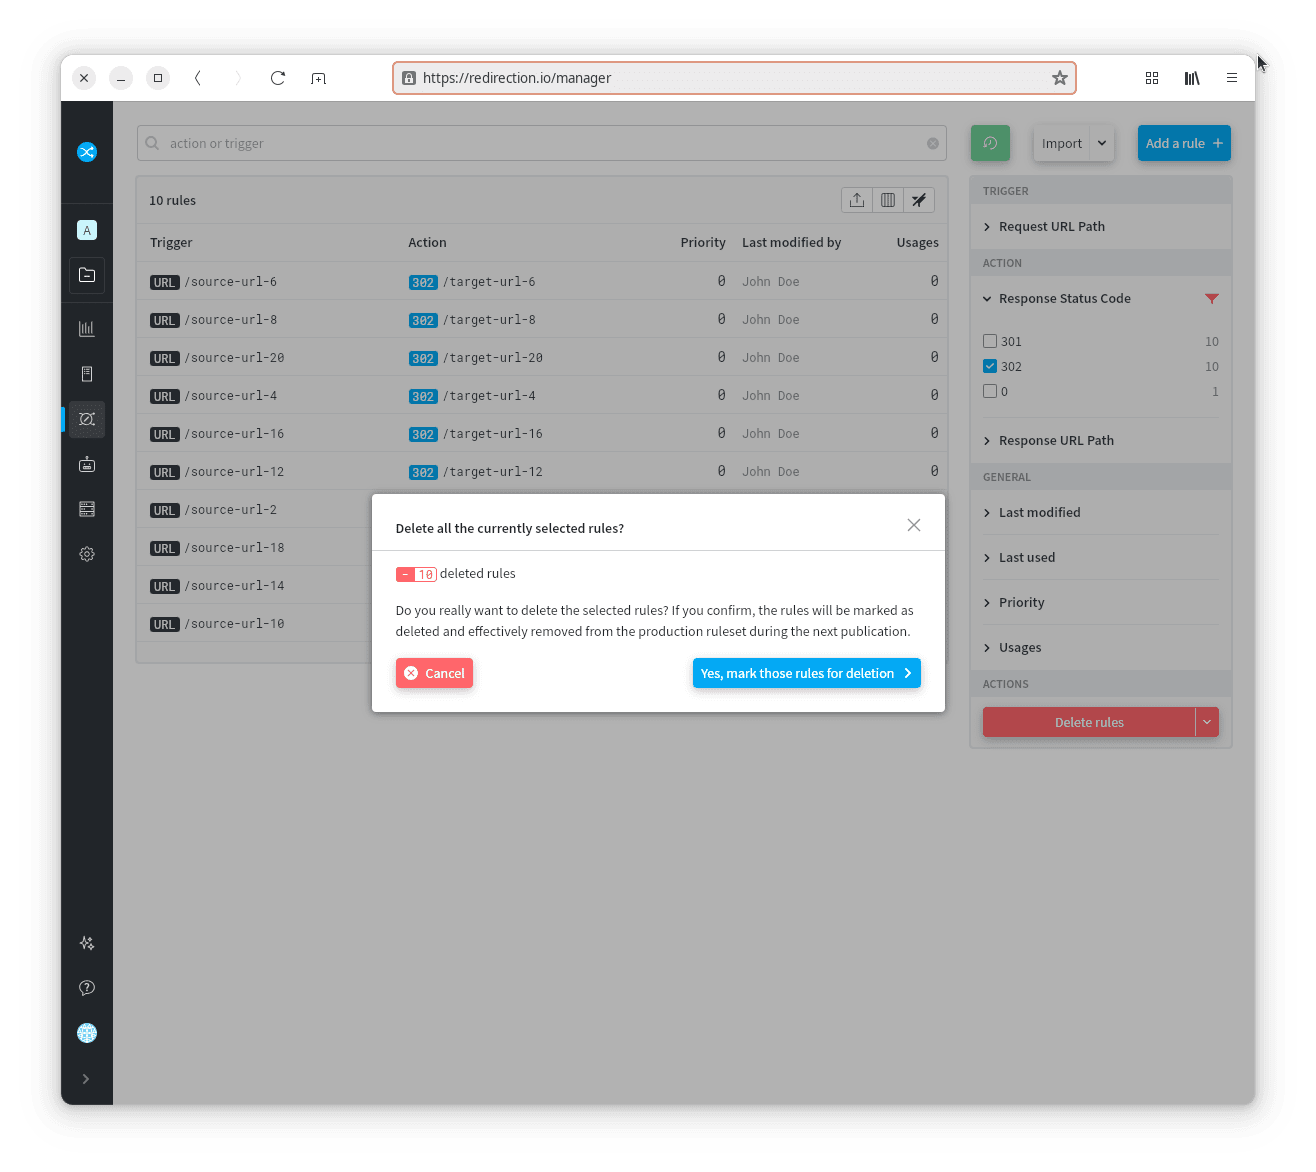
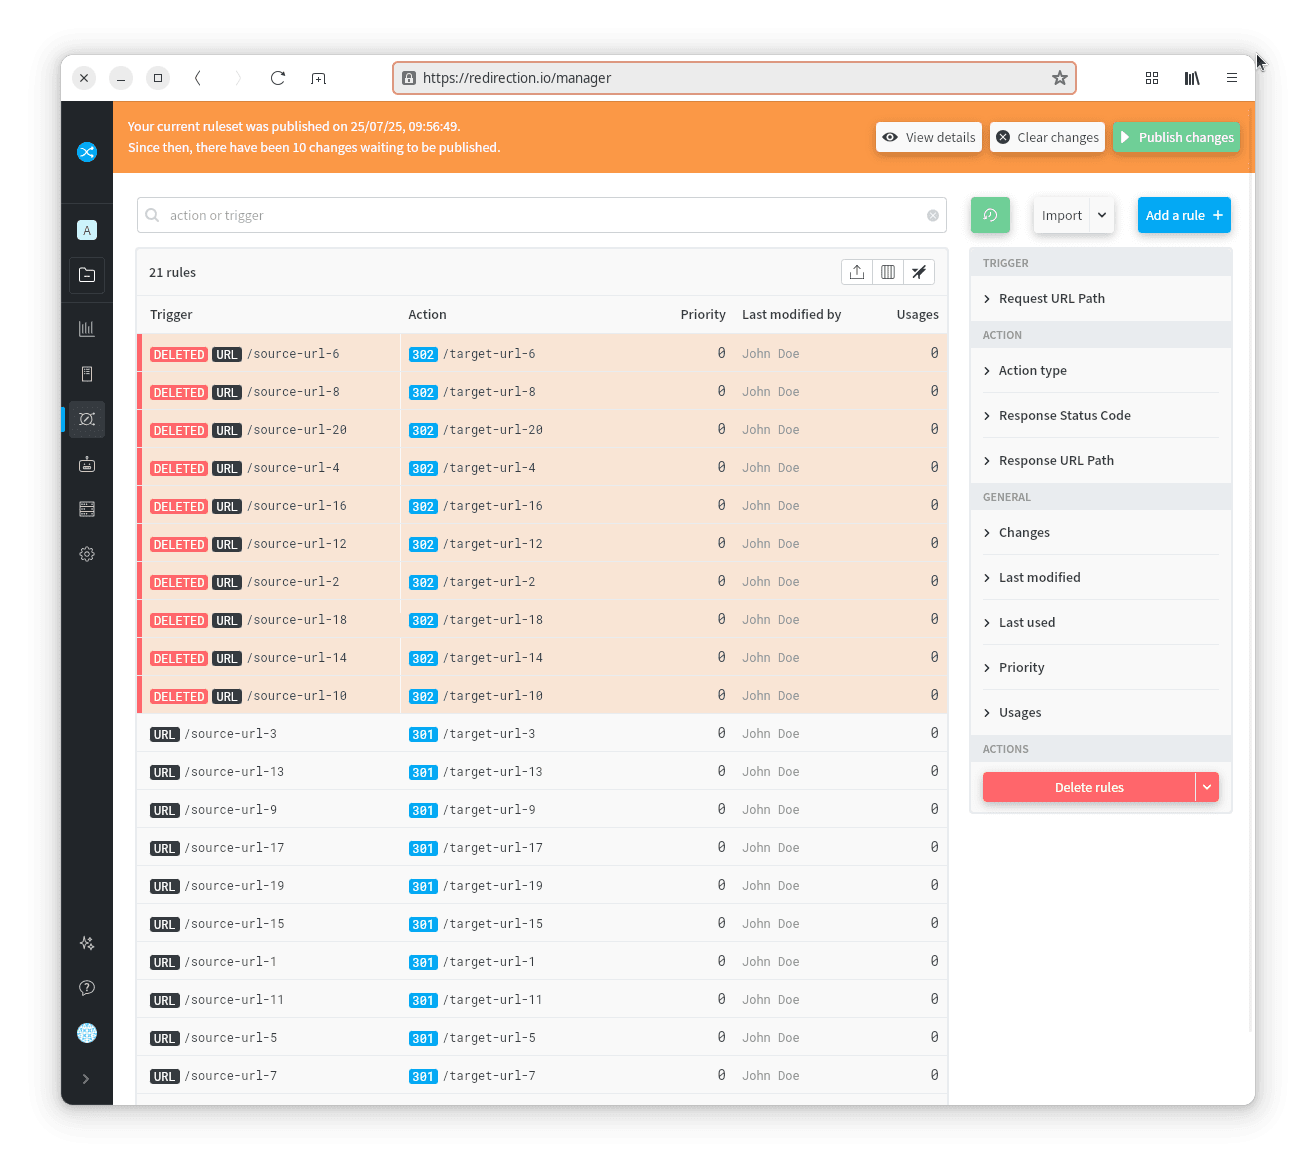
- By selecting rules using filters: this is ideal when the rules you want to delete share common properties.
- By importing a TXT or CSV file: this method is useful if you have a specific list of rule IDs to delete, such as for duplicate rules or rules associated with certain product pages.
Deleting rules using the rules filters
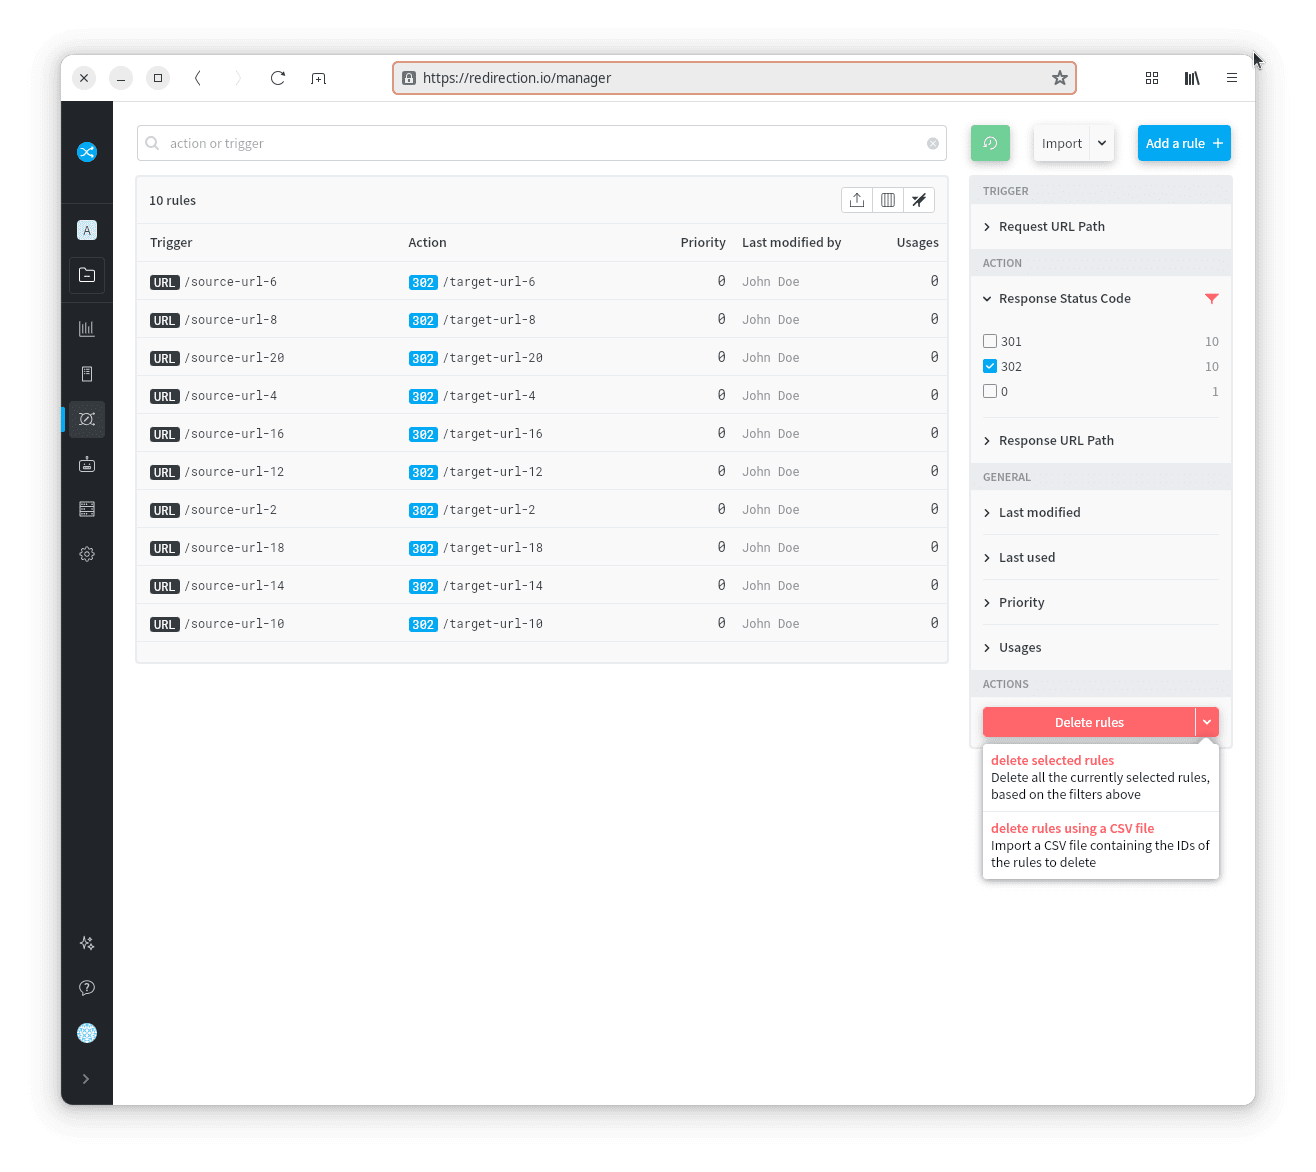


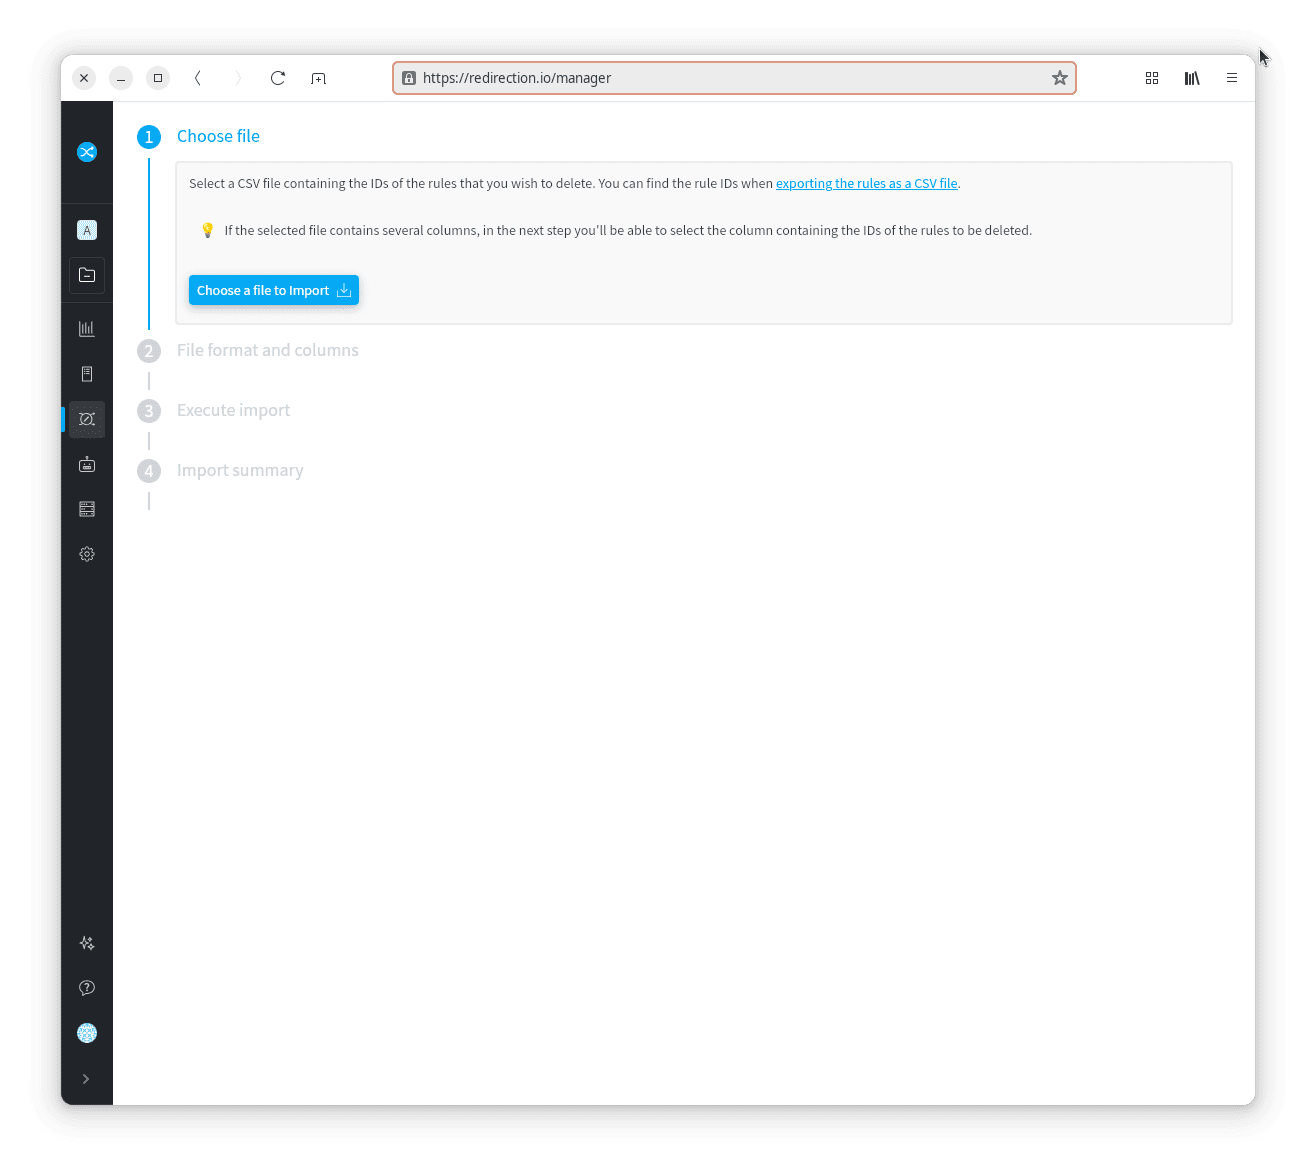
Deleting rules based on a list of rule IDs
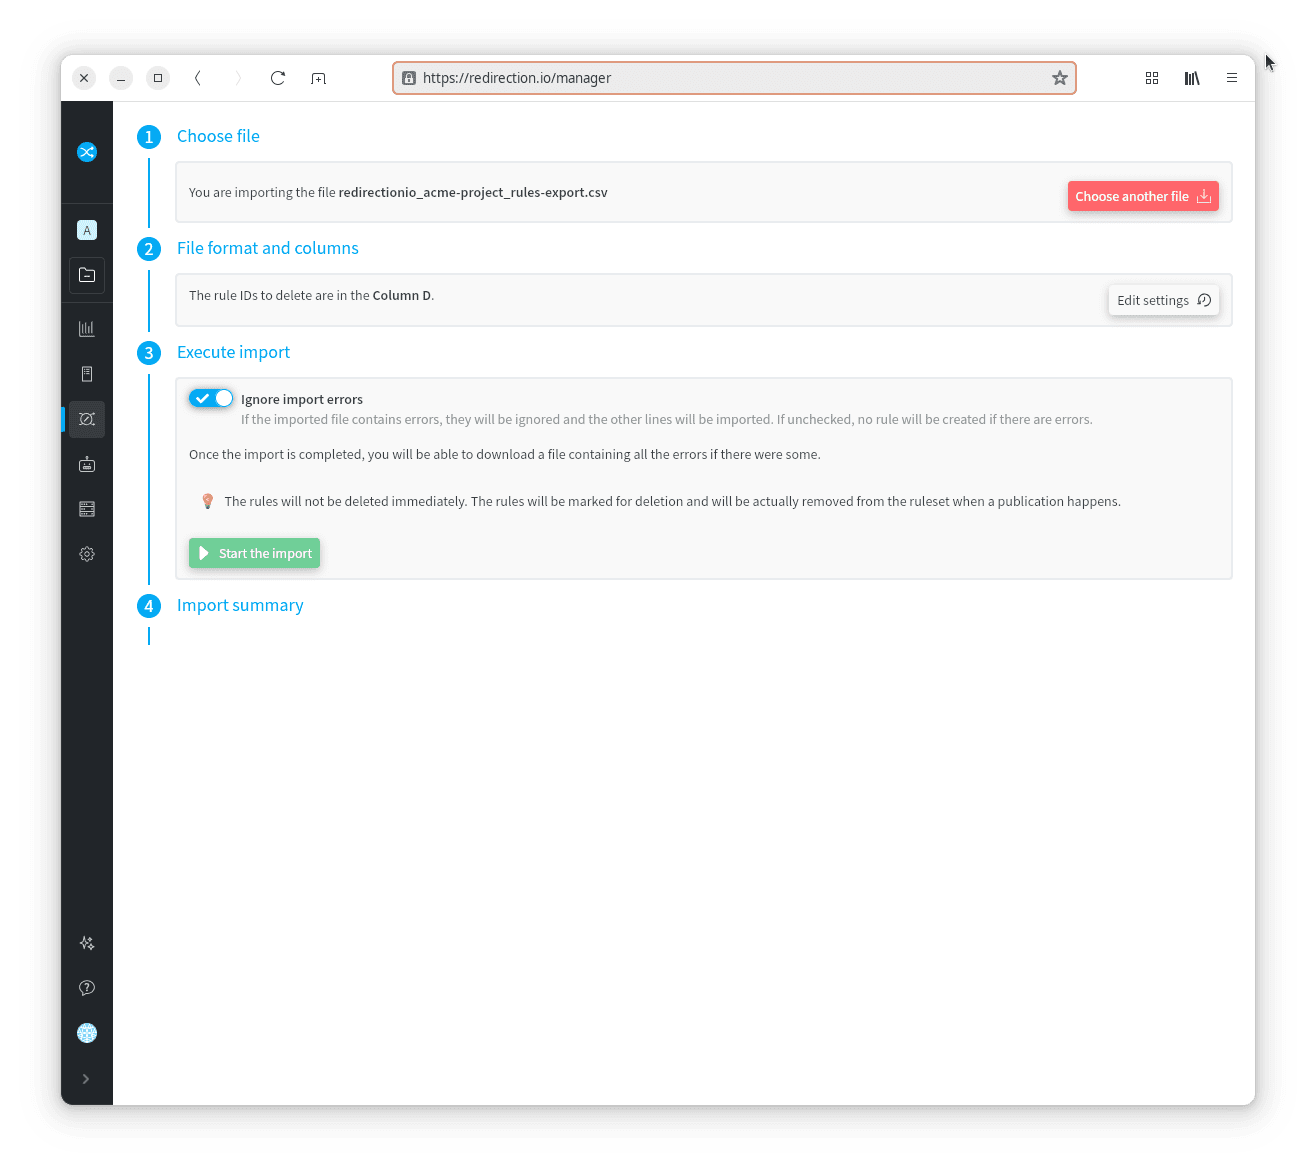
This method is perfect when you can't easily isolate the rules to delete using filters because they don't share common properties. For example, if you need to remove duplicate rules or rules tied to a specific set of product pages.
For such cases, redirection.io allows you to remove rules based on their identifiers (IDs). These identifiers can be found in the rules CSV export file.
The overall process involves three steps:
- Export the rules as a CSV file. This file contains one line per rule, with multiple columns (trigger URL, status code, target, rule creation date, etc., and of course the rule ID)
- Edit this file to keep only rules that need to be deleted. Using your prefered spreadsheet software, isolate the lines for the rules that you want to delete
- Import this file to delete the associated rules. Save the edited CSV file and use it to delete the listed rules.
Once the CSV file contains only the rules that have to be deleted:


Attaching tags to imported rules
By default, redirection.io suggests to attach a timestamped tag to the rules created by an import. You can add more tags if you wish. We recommend that you always associate tags with imported rules, to make it easier to manage the rules in your rule set in the future. For example, if you want to find all the rules created by an import, all you have to do is select the right tag in the list of rules. Deleting them, so that you can replace them with a more up-to-date version, will be an easy operation.
Logs and rules exports
redirection.io allows to export logs or rules as CSV files. In the list of logs or in the list of rules, choose the columns to display, use the filters of your choice, and hit the "Export" icon, on the top right of the list. It will trigger the download of a CSV file containing the chosen columns, using the right filters.
