The instructions below have been customized for your project "".
Customize these instructions for the project
Setting up a redirection server on Azure Cloud
This knowledge base article explains how to setup and configure redirection.io to act as a redirection reverse proxy, that can be used to manage redirections on your main domain, or for managing redirections on additional domains that you own.
The redirection.io agent can act as a reverse proxy and, most importantly, it is a single binary that does not have any particular dependency. This means that it is able to work in almost every hosting environment, provided you can install additional software. However, it is not always the case, and some
The good news is, there are still some ways to use redirection.io on your website! Here the possible solutions:
- try to contact your hosting provider to ask them for a redirection.io availability: our agent is rather easy to install & configure, and we will be helpful with your provider to integrate redirection.io in his platform;
- use Cloudflare Workers and our Cloudflare integration: this option is suitable if you can change the DNS settings for your domain name and accept to be bound by a new contract with Cloudflare. The setup is rather easy, and will require few (if none) technical abilities;
- setup a proxy server close to your infrastructure, in order to run redirection.io as a reverse proxy in front of your website. It is this last case that we will detail in the rest of this article.
Overall setup
Let's imagine the case of John, who hosts his site on the Cloud, in Microsoft Azure, and uses the hosting offer bundled by a software vendor, without being able to install other software on his hosting platform.
In the case of John, a few steps allow to add redirection.io support:
- start a Linux Virtual Machine on Azure Cloud (for example, a Debian by Credativ image, or an Ubuntu by Canonical, but any Linux distribution should work) ;
- install the nginx web server, and redirection.io agent and nginx module ;
- create nginx virtualhost as required by your domains layout.
Let's see in details all these steps with John :-)
Start a Linux Virtual Machine on Azure Cloud
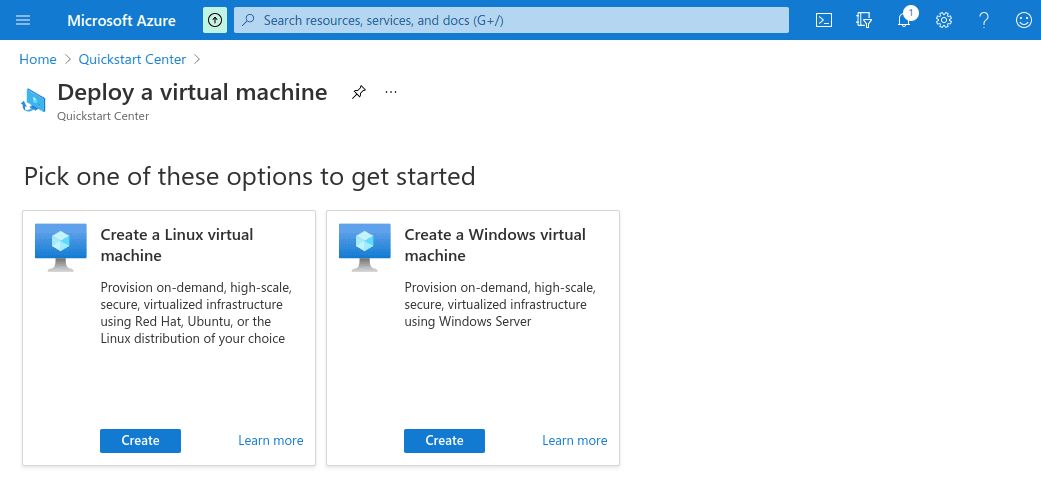
First, start with creating a Linux virtual machine in the Azure portal, as explained in Microsoft's documentation.

Choose the Linux distribution of your choice:

And check that the required ports on the machine will be accessible. Of course, you will need ports 80 and 443, as this machine may be accessed through http or https:

Install all the things
At this step, we follow the steps detailed in our TL;DR; guide:
# update the distribution
sudo apt update && sudo apt dist-upgrade

# install required packages
sudo apt-get install apt-transport-https gnupg2

# add redirection.io repository key
wget -q -O - https://packages.redirection.io/gpg.key | sudo apt-key add -

# add our Debian repository urls:
echo "deb https://packages.redirection.io/deb/stable/2 any main" | sudo tee -a /etc/apt/sources.list.d/packages_redirection_io_deb.list
echo "deb https://packages.redirection.io/deb/stable/2 bookworm main" | sudo tee -a /etc/apt/sources.list.d/packages_redirection_io_deb.list

# install the required packages
sudo apt update && sudo apt install redirectionio-agent libnginx-mod-redirectionio
All the required components are now installed, and we are just a few steps of starting redirections :-) Edit the nginx default VirtualHost to enable redirection.io:
sudo nano /etc/nginx/sites-enabled/default
In the server section, add a redirectionio_project_key directive:
server {
        listen 80 default_server;
        listen [::]:80 default_server;
        redirectionio_project_key SOME_PROJECT_KEY_HERE;

        # leave other lines untouched
}
You can find the project key in the "instances" screen of the manager (click on the "Setup on your infrastructure" button).
Restart nginx, and here we go!
sudo systemctl restart nginx
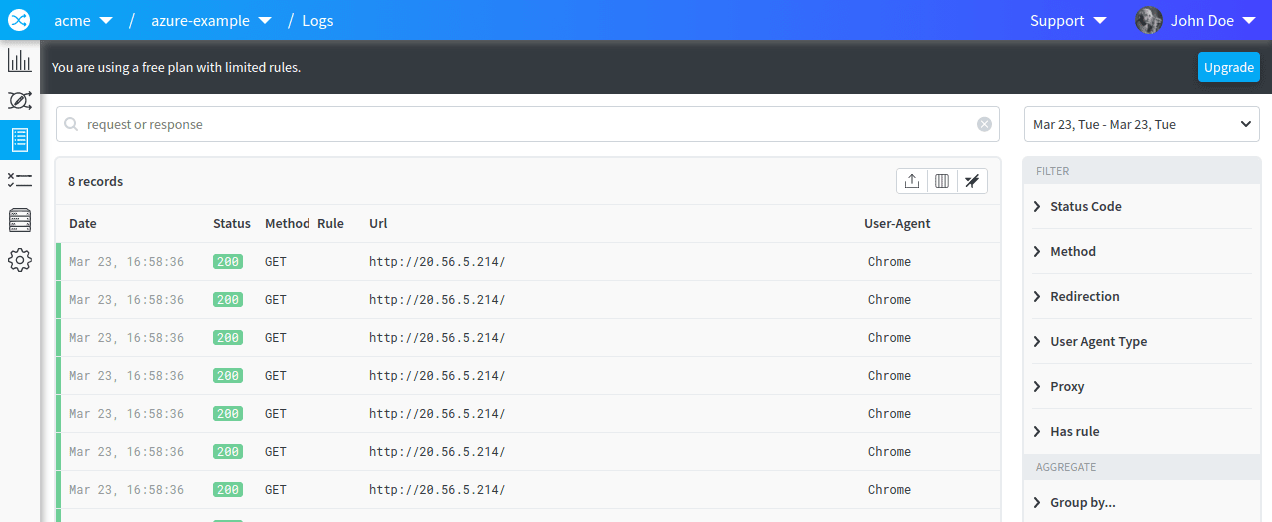
Now, open your favorite web browser, and head to http://<IP ADDRESS OF YOUR VIRTUAL MACHINE>. Wait a few seconds, and in the redirection.io manager head to the "Logs" tab. You should see log lines appear:

redirection.io is correctly installed, and runs as a "traditional" HTTP server (ie., for the moment it doesn't proxify requests to your website). You can execute redirections for all the incoming requests, but you can not serve real pages from your website. This is sometimes convenient, however: if you just want to redirect parking domain names without serving any real web page, you can stop here the setup.
Proxify traffic to your real website
In order to serve real pages and still be able to use the newly installed redirection server, we have to create a reverse proxy in nginx configuration. There is plenty of literature available about how to use nginx as a reverse proxy, so we will not detail much of it here.
Start by creating a new nginx VirtualHost, in /etc/nginx/sites-available/your-website.com:
sudo nano /etc/nginx/sites-available/your-website.com
Paste the following in it:
server {
        listen 80;
        listen [::]:80;
        server_name your-website.com www.your-website.com;

        # redirection.io project key
        redirectionio_project_key SOME_PROJECT_KEY_HERE;

        # logs
        error_log /var/log/nginx/site-error.log;
        access_log /var/log/nginx/site-access.log;

        # reverse proxy configuration
        location / {
                proxy_set_header Host $http_host;
                proxy_set_header X-Real-IP $remote_addr;
                proxy_set_header X-Forwarded-For $proxy_add_x_forwarded_for;
                proxy_set_header X-Forwarded-Proto $scheme;
                proxy_pass http://YOUR REAL WEBSITE IP ADDRESS;
        }
}
Of course, replace:
- the domain name(s) to listen to;
- the redirection.io project key, that you can find in the "instances" screen of the manager;
- the public IP address of your real website machine (or a local private IP address, if you have setup a private area network to group your infrastructure virtual machines).
Enable this VirtualHost by creating a symlink:
sudo ln -s /etc/nginx/sites-available/your-website.com /etc/nginx/sites-enabled/your-website.com
And reload nginx:
sudo systemctl reload nginx
Provided you have changed the A field in the
The redirection reverse proxy is now setup, you can learn how to create your first redirection rules!
One last thing - I need https
https is nowadays a de facto requirement. Of course, as you have changed the IP addresses for your domain, and as nginx is now the frontend http equipment for your website, the TLS termination has to be performed on this redirections proxy server. This simply means that the SSL certificates management will now be made on your newly created server, and that you have to configure nginx to listen on the 443 port using your domains SSL certificates. Here is usually the nginx VirtualHost changes that have to be performed at this step:
server {
        listen 80;
        listen [::]:80;
        server_name your-website.com www.your-website.com;

        # redirection.io project key
        redirectionio_project_key SOME_PROJECT_KEY_HERE;

        # logs
        error_log /var/log/nginx/redirect-error.log;
        access_log /var/log/nginx/redirect-access.log;

        # reverse proxy configuration
        location / {
                return 301 https://your-website.com$request_uri;
        }
}

server {
        listen 443 ssl http2;
        listen [::]:443 ssl http2;
        server_name your-website.com www.your-website.com;

        # Look for example at https://wiki.mozilla.org/Security/Server_Side_TLS
        ssl_protocols TLSv1.2 TLSv1.3;
        ssl_ciphers "ECDHE-ECDSA-AES256-GCM-SHA384:ECDHE-RSA-AES256-GCM-SHA384:ECDHE-ECDSA-CHACHA20-POLY1305:ECDHE-RSA-CHACHA20-POLY1305:ECDHE-ECDSA-AES128-GCM-SHA256:ECDHE-RSA-AES128-GCM-SHA256:ECDHE-ECDSA-AES256-SHA384";
        ssl_prefer_server_ciphers on;

        # Diffie-Hellman parameter for DHE ciphersuites
        ssl_dhparam /path/to/your/certificate/dhparam.pem;

        # The certificate chain sent to the browser, as well as the private key.
        # Make sure your private key is only accessible by the webserver during
        # configuration loading (which by default is done with user root).
        ssl_certificate /path/to/your/certificate/fullchain.pem;
        ssl_certificate_key /path/to/your/certificate/privkey.pem;
        ssl_trusted_certificate /path/to/your/certificate/chain.pem;

        # For OCSP stapling, we need a DNS resolver. Here only Google DNS servers
        # are specified; I would prepent them by your hoster's DNS servers.
        # You can usually find their IPs in /etc/resolv.conf on your webserver.
        resolver 8.8.8.8 8.8.4.4 valid=300s;
        resolver_timeout 10s;

        # Enabling OCSP stapling. Nginx will take care of retrieving the OCSP data
        # automatically. See https://wiki.mozilla.org/Security/Server_Side_TLS#OCSP_Stapling
        # for details on OCSP stapling.
        ssl_stapling on;
        ssl_stapling_verify on;

        # Enables a SSL session cache. Adjust the numbers depending on your site's usage.
        ssl_session_cache shared:SSL:50m;
        ssl_session_timeout 1d;
        ssl_session_tickets off;

        # Set the buffer size to 1400 bytes (that way it fits into a single MTU).
        ssl_buffer_size 1400;

        # You should only use HSTS with proper certificates; the ones from Let's Encrypt
        # are fine for this, self-signed ones are not. See MozillaWiki for more details:
        # https://wiki.mozilla.org/Security/Server_Side_TLS#HSTS:_HTTP_Strict_Transport_Security
        add_header Strict-Transport-Security "max-age=31536000;";

        # redirection.io project key
        redirectionio_project_key SOME_PROJECT_KEY_HERE;

        # logs
        error_log /var/log/nginx/site-error.log;
        access_log /var/log/nginx/site-access.log;

        # reverse proxy configuration
        location / {
                proxy_set_header Host $http_host;
                proxy_set_header X-Real-IP $remote_addr;
                proxy_set_header X-Forwarded-For $proxy_add_x_forwarded_for;
                proxy_set_header X-Forwarded-Proto $scheme;
                proxy_pass http://YOUR REAL WEBSITE IP ADDRESS;
        }
}
On your real website hosting server, you do not need anymore to care about https, as the SSL negociation is now handled on this proxy server.